I love cake.
I love paper crafting.
I love a challenge.
All three of these loves came together for today's project!
But first, the backstory...
A while back, I was contacted by a friendly blogger named Michal who owns a scrapbooking site. She wrote me a message full of very kind words and asked if I'd like to be featured on her site. I jumped at the chance!
You see...Michal lives across the globe in...Israel! I have never been to Israel, I don't speak a word of Hebrew or Arabic... so I figured this was as close as I was going to get...at least for now!
Michal was especially interested in the templates I had designed and she asked if I'd be willing to come up with a little template to feature on her website. This was a win-win for me! I love the challenge of designing a template....I love paper crafting...and I knew exactly what this template would be....CAKE!!! I love cake!!! (not german chocolate though. it's gross).
Now, let me not pretend that I am the originator of a cake box template. I certainly am not. BUT, I did design this template to be a bit different from the ones I've seen. It's a little bigger, it's easier to cut out (at least I think so), it's designed to scale (just download and print!) and it's free!
Today, I'll be sharing one of the projects I made using this template...it's a fun one!
First though...a quick photo-walkthrough of the template.
(click to download)
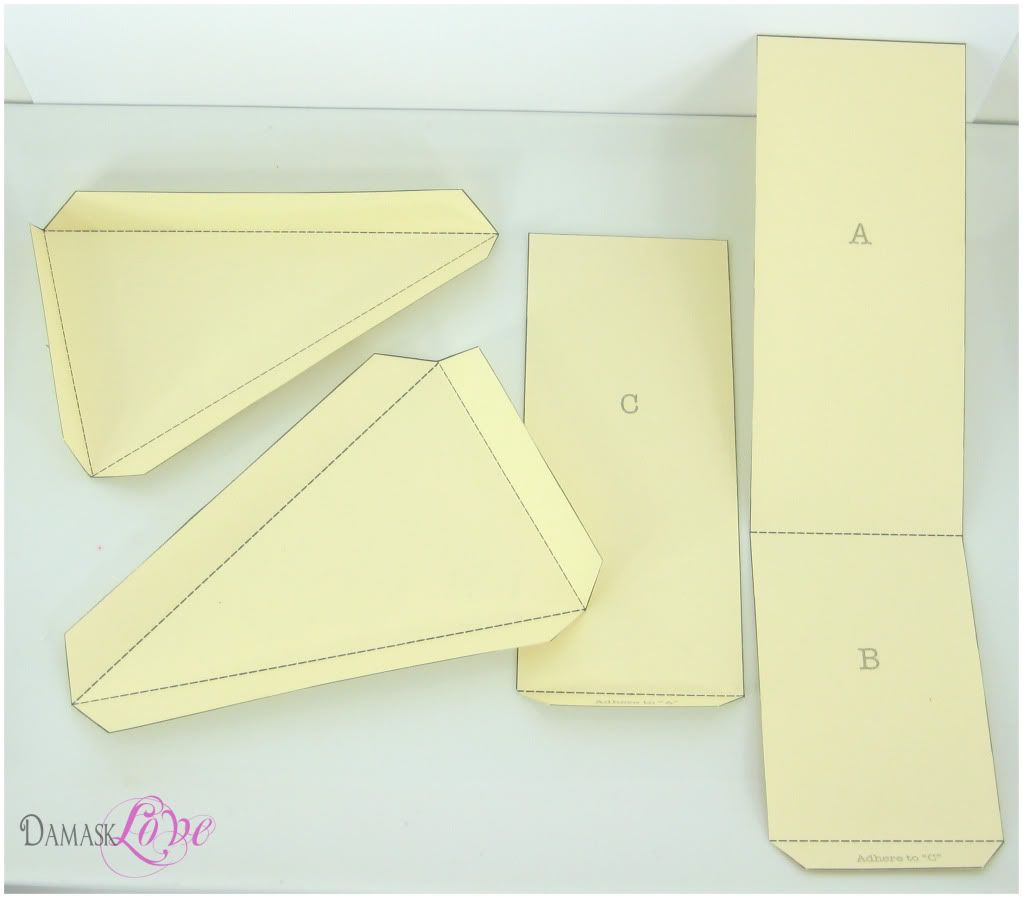
The template includes two pages and four shapes. Cut them out and score on the
dotted lines.
dotted lines.
The two strips labeled with letters will make up the side walls of the box.
The triangle shapes will be the top and bottom.
The triangle shapes will be the top and bottom.
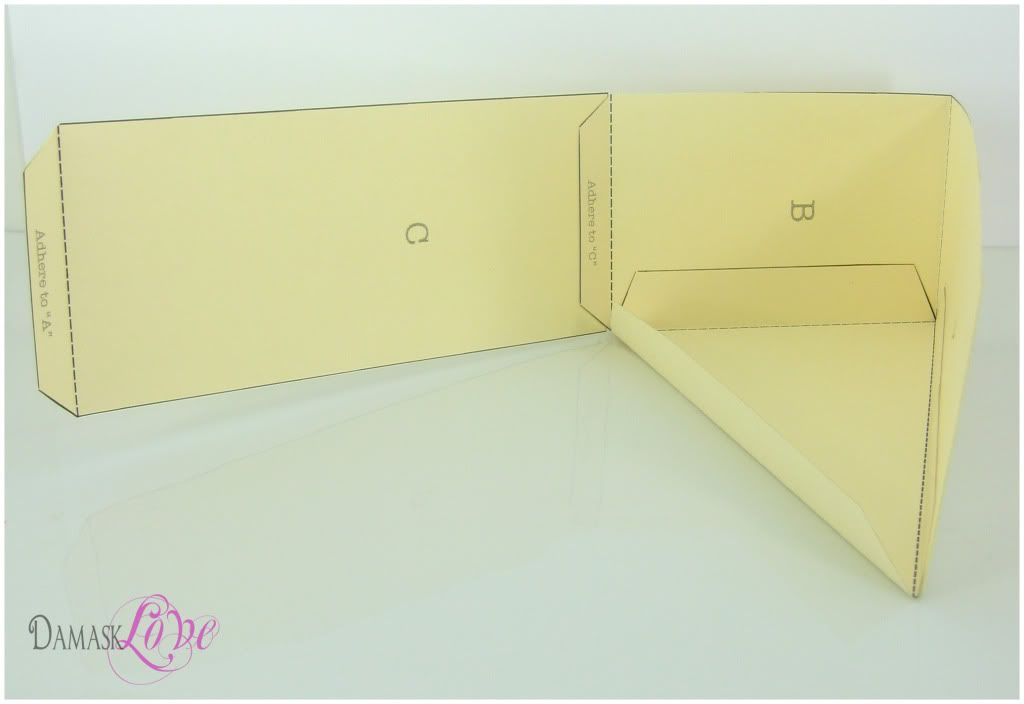
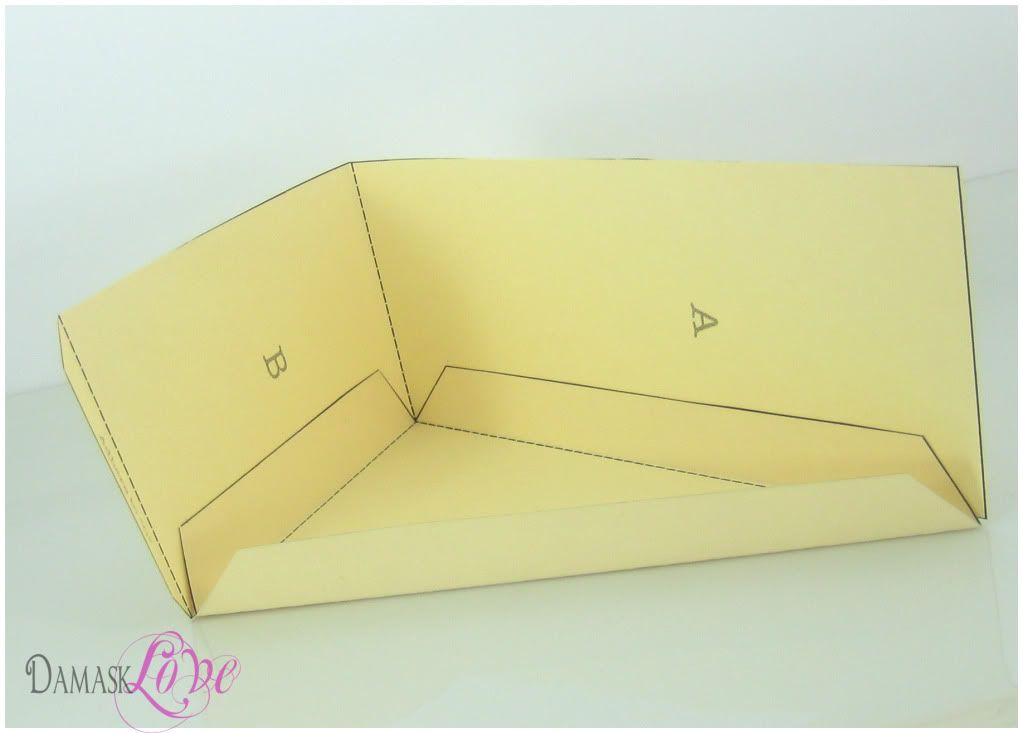
Connect the strips using the notched tabs at the end. Doing this will
create the complete wall of the box.
create the complete wall of the box.
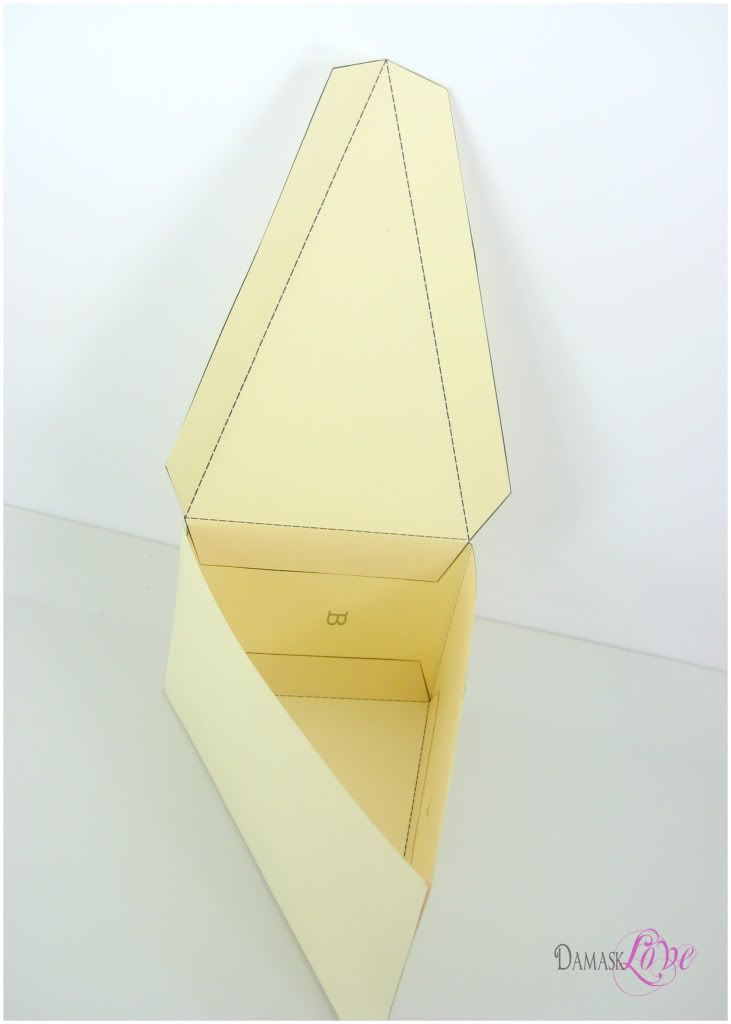
Adhere the top to the box so that it opens as pictured.
Fill the box with whatever you'd like and seal shut with adhesive
With the box assembled, the possibilities are endless for decorating it.
For my project....I did things a little differently...shocker, I know.
Everyone has seen a cake box before. You know what they look like, how they're decorated...so there's no need to do that here, right?
Instead, I decided to turn this template on it's head....literally.
I took the cake box and dressed it up for a party!!! A birthday party!!
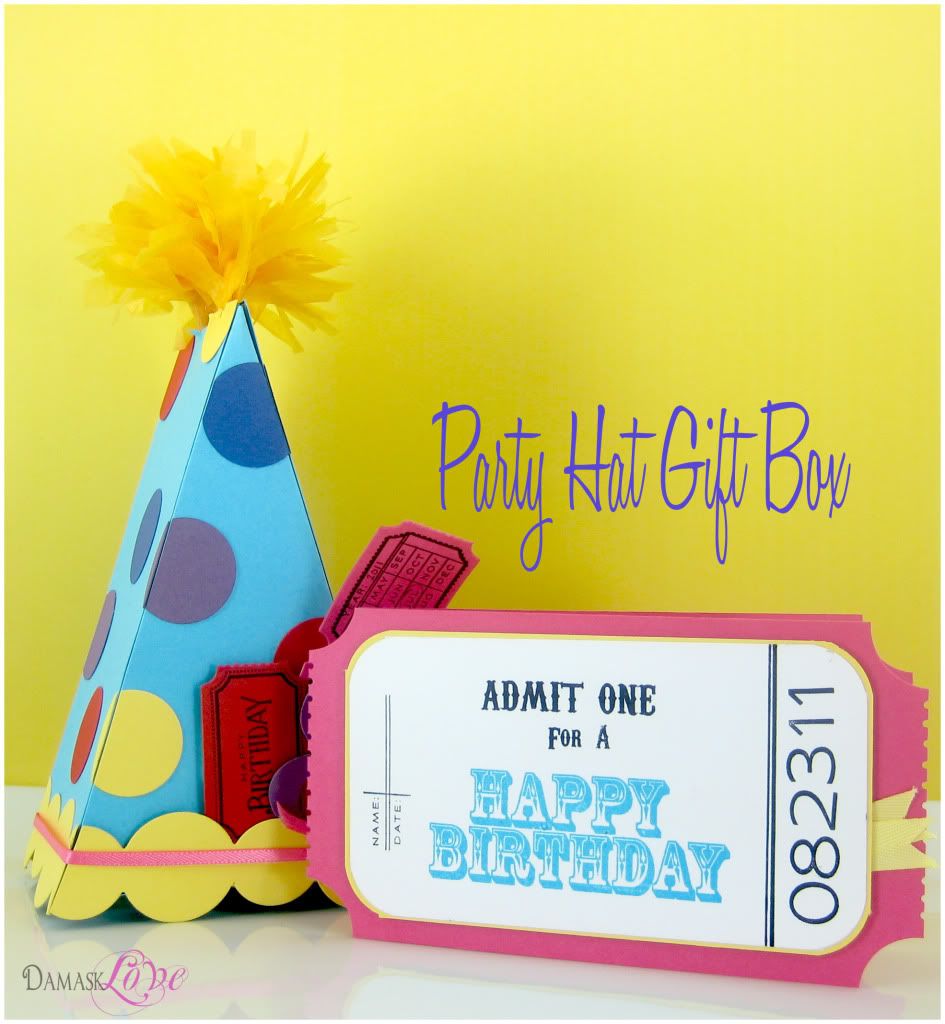
I printed the template onto blue cardstock, then decked it out with polka dots and a tissue paper topper! A few die cut tickets added some flair.
The die cut tickets gave me the idea to make a cute, coordinating card for this little gift box.
I used my 1/16" hole punch to cut notches from the card edge to mimic the perforation on a carnival ticket.
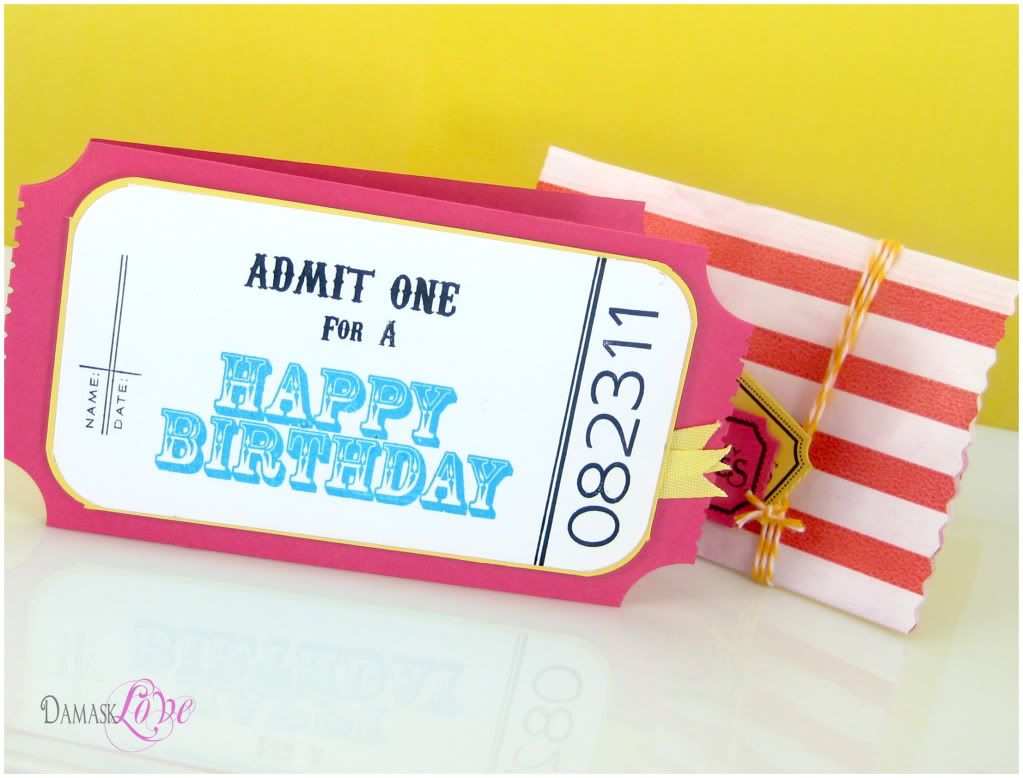 |
| I packaged the card in a striped glassine bag from Sweet Lulu Shop... check it out, you'll love the products, I promise! |
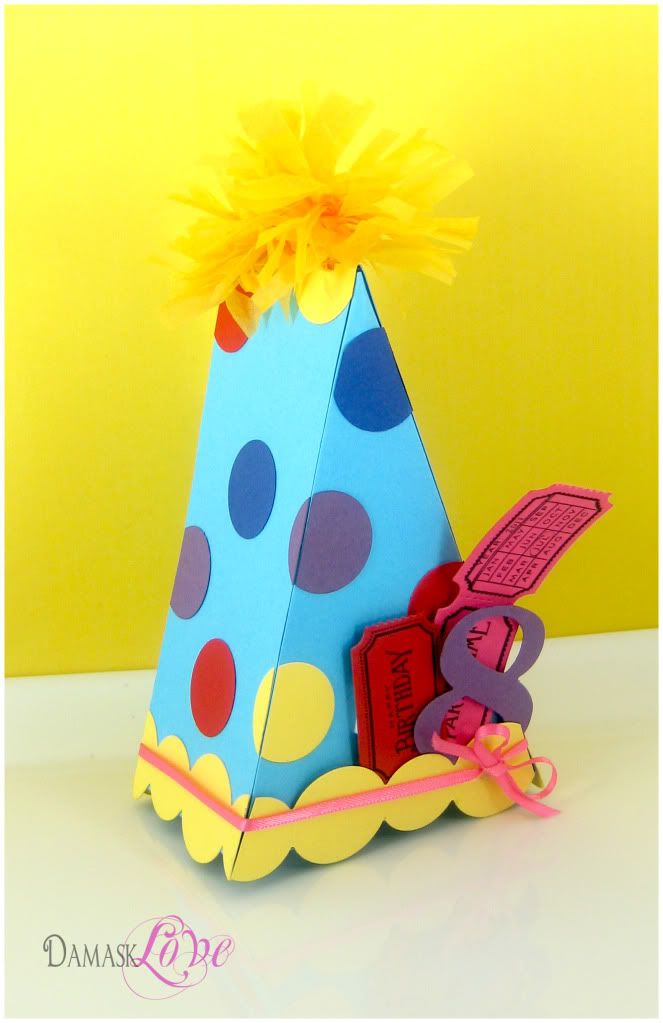 |
| I used the PTI By the Numbers die to add the age of the recipient... in all honesty, I don't know any kids who are turning 8, but I thought the 8 looked best because it's symmetrical! Just being honest:-) |
Thanks for stopping by for some Damask Love! Come back tomorrow when I'll share another project using this template! It's gonna be a fun one:-)
Edited to add: Check out the article. You can use Google Translate to read it in English!
Supplies:
Ticket Card:
Stamps: PTI (Fresh Alphabet, Say it With Style, Just the Ticket) My Cute Stamps (Circus Animals)
Cardstock: PTI (Raspberry Fizz, Harvest Gold, White)
Ink: Ranger Archival Ink Jet Black, Stampin Up Tempting Turquoise
Other: PTI twill ribbon, corner rounder, 1" circle punch, 1/16" hole punch, Sweet Lulu Shop striped glassine bag
Party Hat: Gift Box:
Stamps: PTI (Just the Ticket)
Cardstock: PTI (Hawaiian Shores, Harvest Gold, Pure Poppy, Plum Pudding)
Ink: Ranger Archival Ink Jet Black
Other: PTI Simple Circles Die, PTI By the Numbers Die, Damask Love Cake Box Template, Michael's pink ribbon
wow - that's so fun! I love the ticket-shaped card!
ReplyDeleteGreat template. Thanks for sharing it. Very cute box!
ReplyDeleteAwesome! I love that you can't even use our own designs for their original purpose. :)
ReplyDeleteAmber!!
ReplyDeleteWhat a sweet project!
It was a great working with you.
Thanks,
Michal Shoval
www.scrap.co.il
You rock, you crafty girl you! LOVE this bright and fun birthday ensemble! What a fabulous job!
ReplyDelete