It's Papertrey Blog Hop time!!!
This is one of my favorite monthly crafting events! So much creativity, inspiration and camaraderie!

My post for this Blog Hop is a long one....so settle in and hang out with me for a bit...I'm so excited to have you over and I have lots of things to share!
The theme for this month's hop is Flowers.
If you know anything about me or my blog, you know that my approach is sometimes literal, sometimes out of the box. Well, today's project is a little of both!
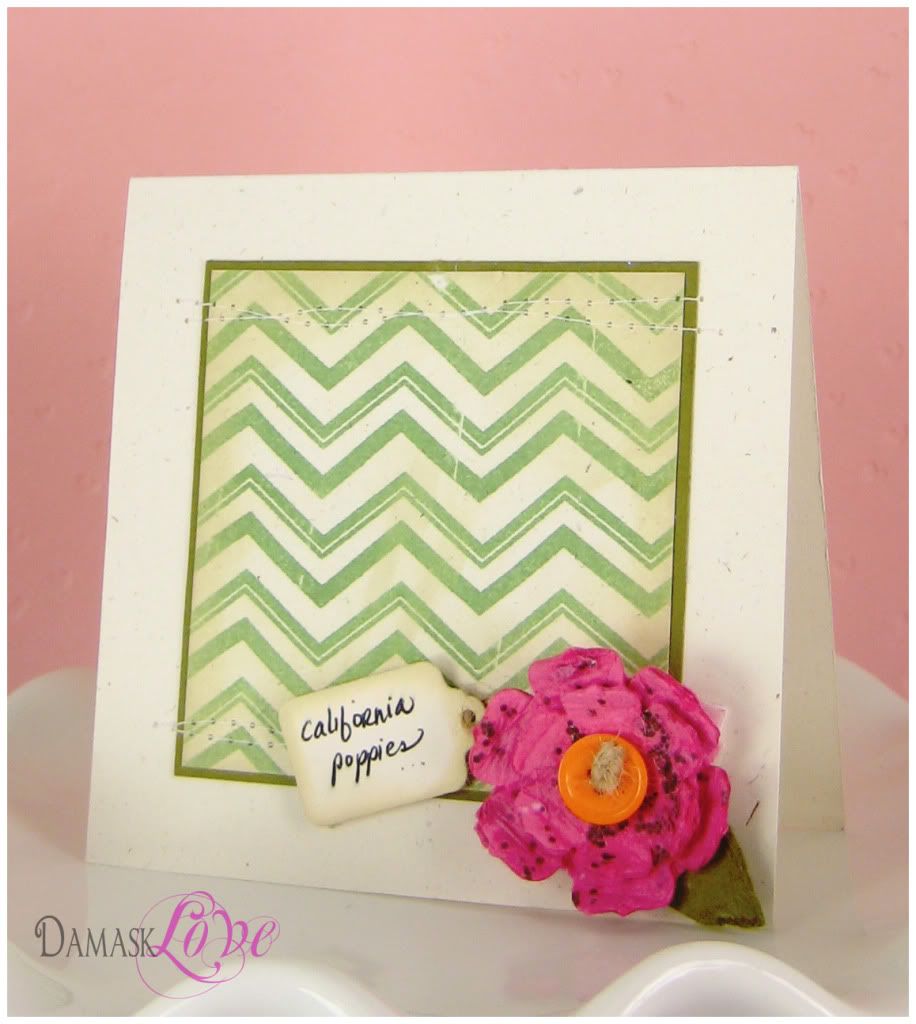
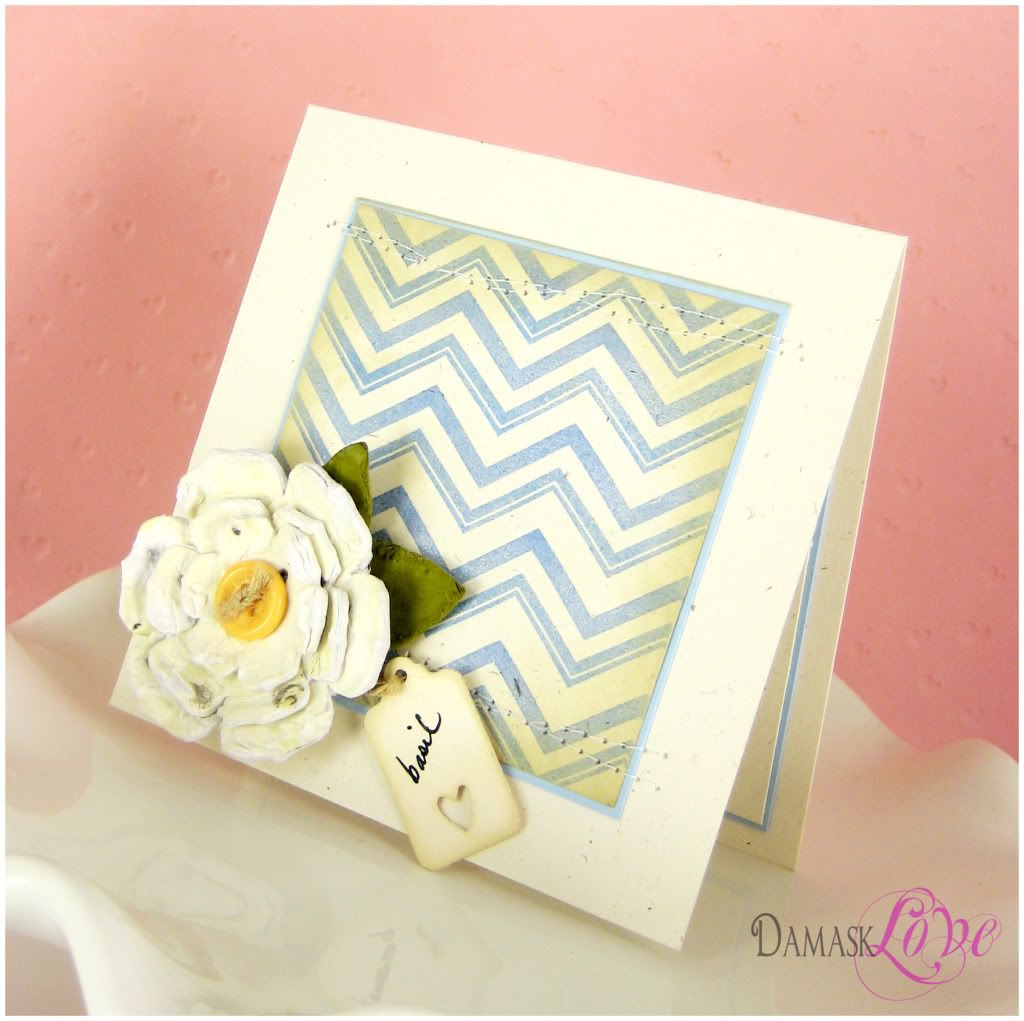
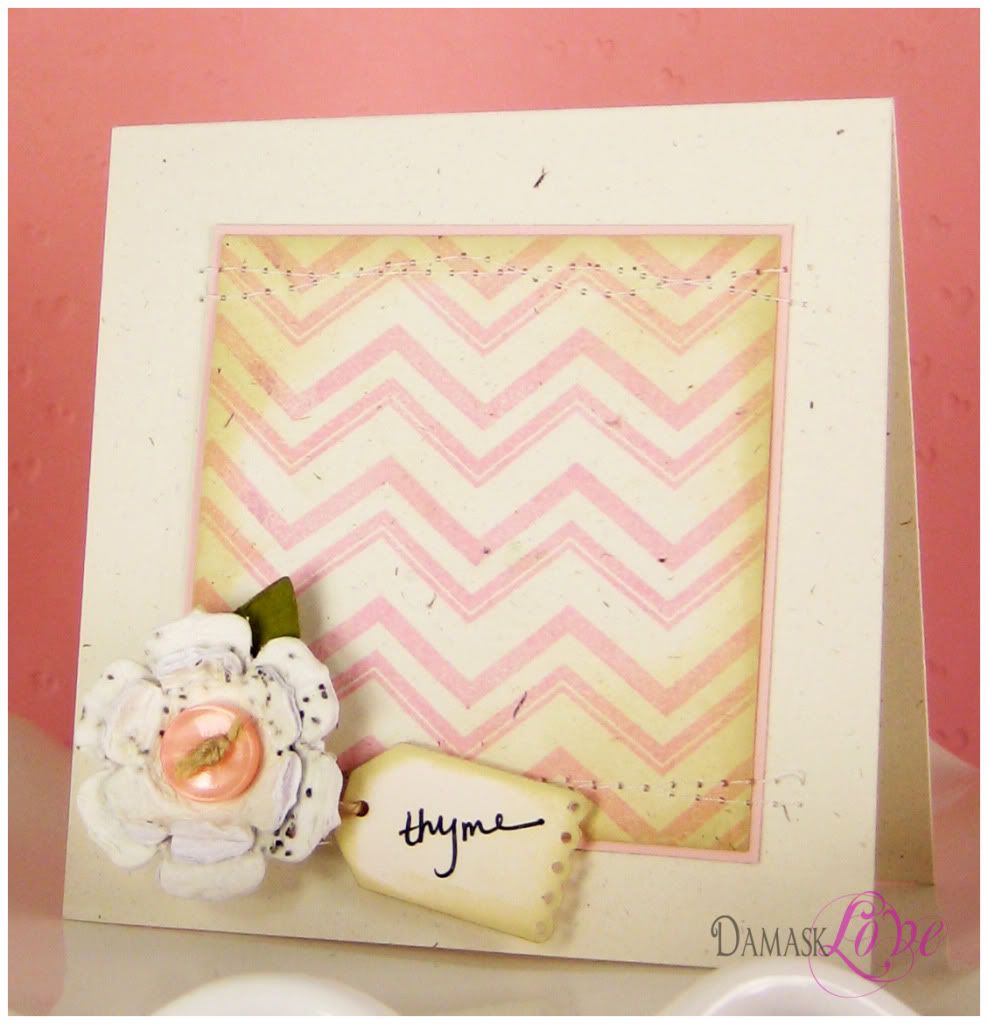
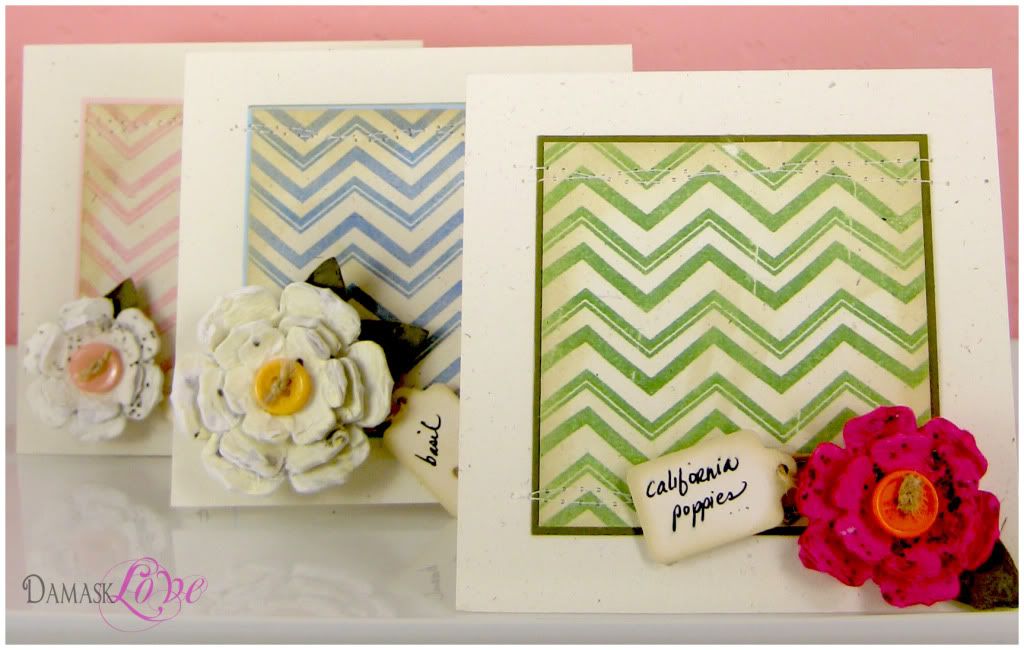
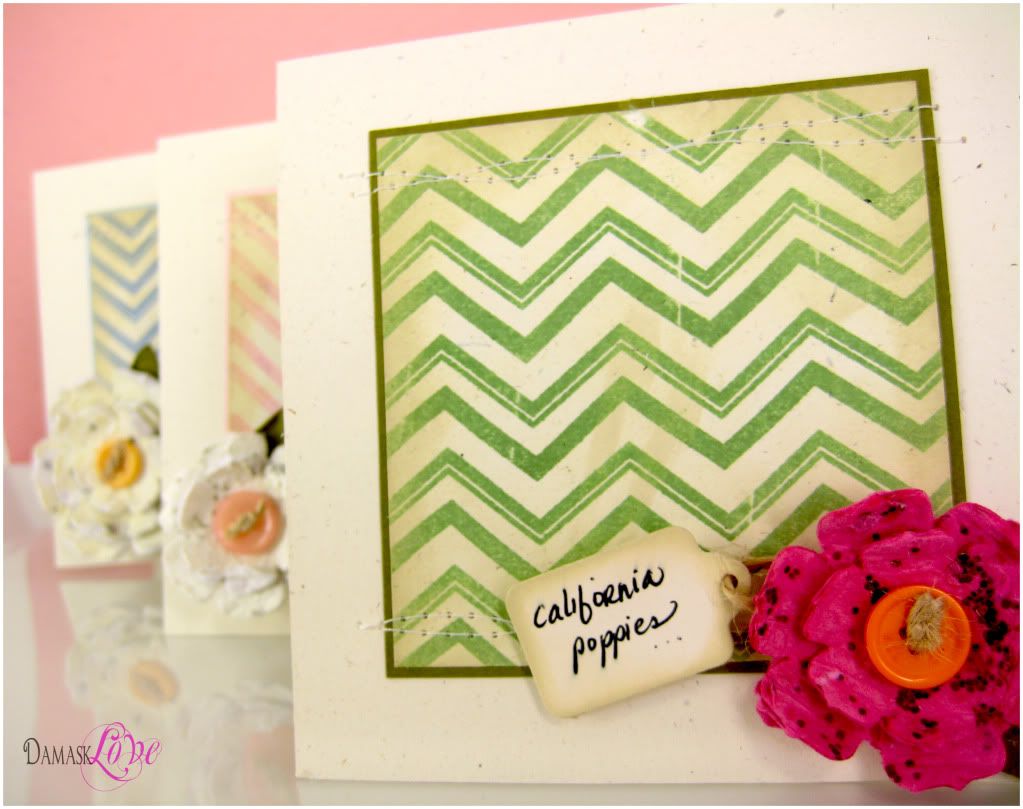
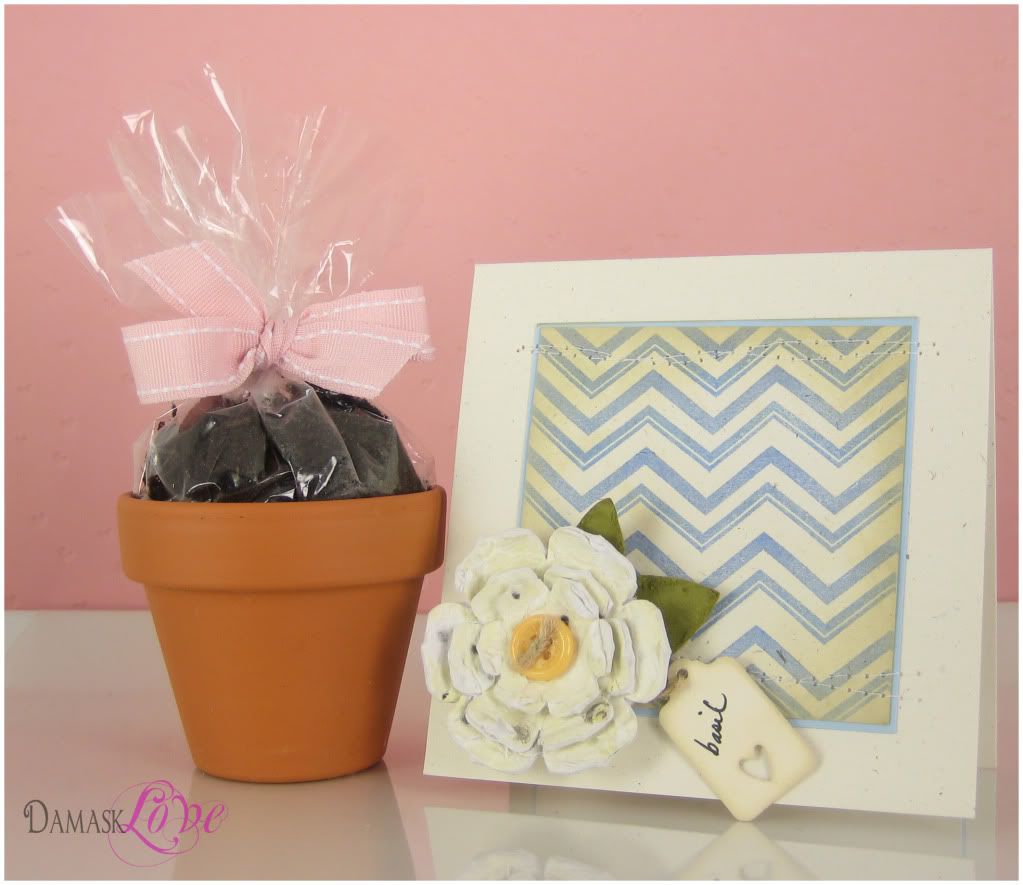
First up are the cards I've made for the hop. I paired the Chevron Stripes stamp set with distressed edges and Rustic Cream cardstock to create a vintage-y feel - but still clean and simple!
*****
Now that you've seen the finished product, let me take you back to the beginning ... before these cards were born...when they were just an idea in my head!
After some brainstorming and researching, I decided that I would take the literal approach to the flower theme.
Not only would the cards feature a flower embellishment, but they would contain actual flowers!!!!!
How? With some plantable paper, of course!
As paper-crafters, we put lots of time and love into each creation. We hope the recipients appreciate the effort and we cringe at the thought of our handmade cards ending up in the trash! (it hurts to even type that!)
Plantable paper is a great way to extend the longevity of your cards and make sure they'll serve a special purpose in the life of each recipient.
Even better - plantable paper is super easy to make!
I really mean it.
I'm not pulling a "Martha-Stewart-it's-so-easy-to-raise-bees-and-harvest-your-own-honey" move. I promise. This is really really easy.
$20 and a trip to Home Depot is all you'll need!
Now, I'll walk you through the steps of how to make plantable paper, as well as share a few more photos of the finished product.
How to Make Your Own Plantable Paper
please excuse the yucky photos! I did this on my balcony.
Materials:
Wooden Dowels
Twine
Aluminum Mesh
Staple Guns or Tacks
Blender
Paper or Cardstock Scraps
Plastic Tub
Old Dishtowels
Seeds (small ones work best)
Drying Rack or Cookie Sheet
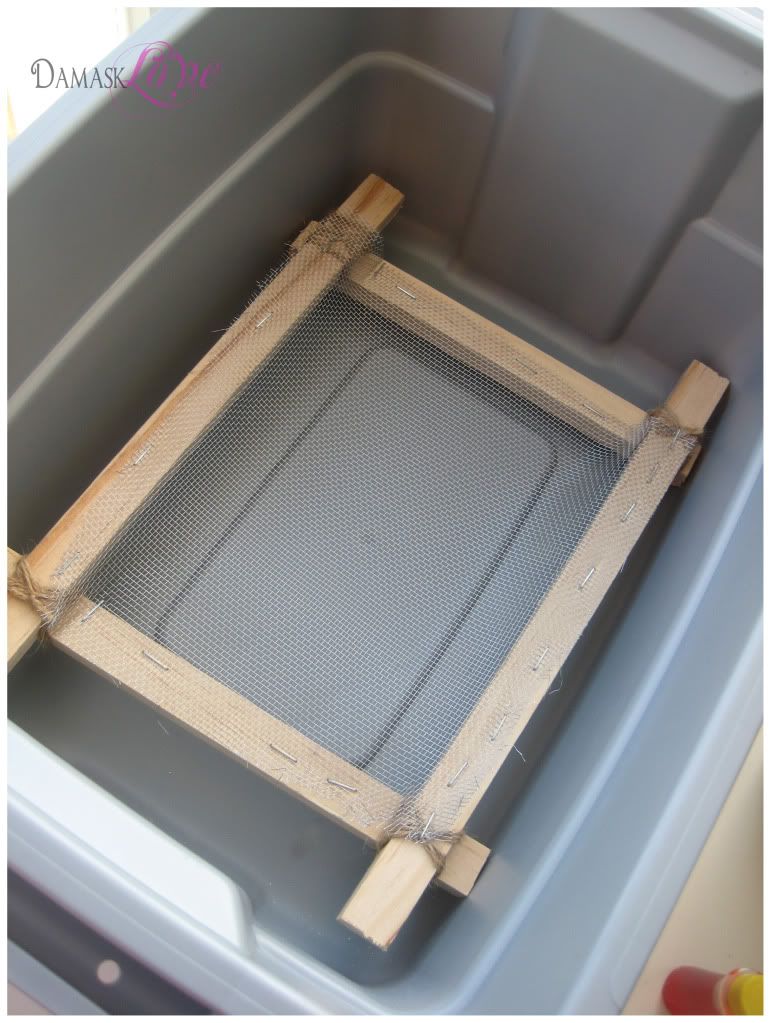
Step 1: Make a frame
Start with four lengths of wood (dowels or molding both work well). I used molding, which you can have cut on-site at most Home Depot stores.
Overlap the dowels to create the frame and use twine or wire to secure the corners.

Step 2: Add Mesh to Frame
You'll need aluminum mesh... the same stuff used on screen doors. It is sold in huge rolls...way more than you'll need for this project! It is very inexpensive though! Only $7 for the roll I purchased.
Cut the mesh down to the size of your frame and use a staple gun (or tacks) to secure the mesh to the frame. It doesn't matter which side of the frame you attach the mesh to.

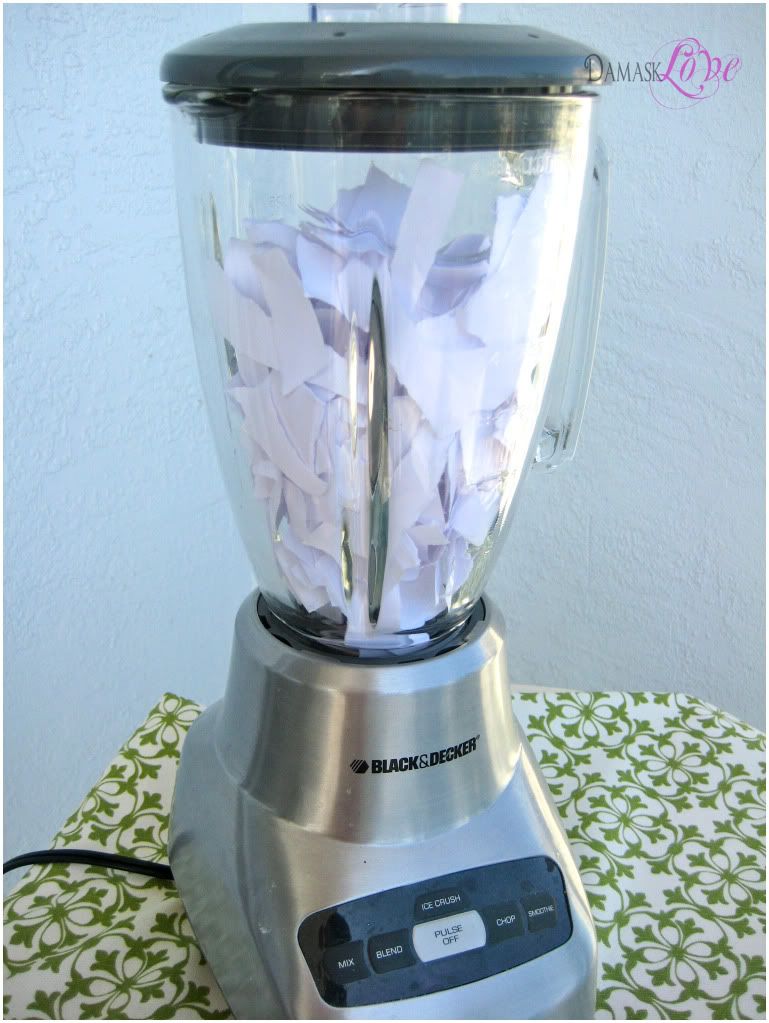
Step 3: Make a Paper Smoothie
(if you have children, you may want to be very vigilant during this step. It looks like a smoothie - but I can't imagine that a paper pulp smoothie is very delicious!)
Add shredded or ripped paper to the blender until it is about half full (I filled mine up a bit too much).
You can use any paper you like. This is a great way to up-cycle old newspapers, mail or paper crafting scraps.
You can use any paper you like. This is a great way to up-cycle old newspapers, mail or paper crafting scraps.
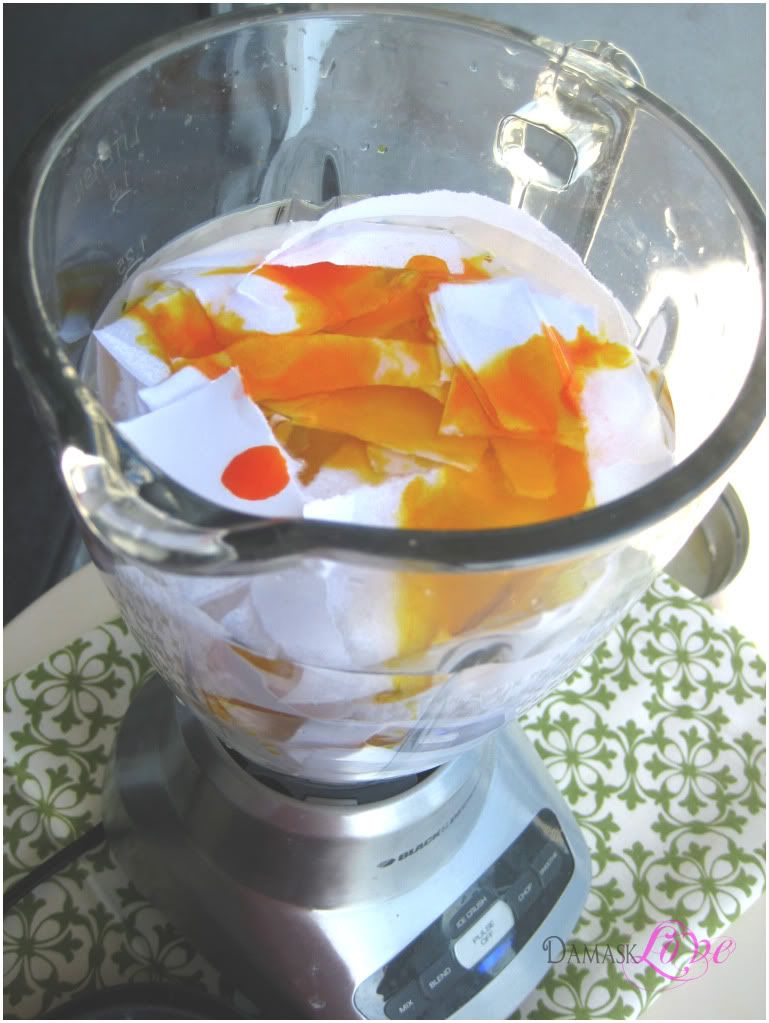
Fill the blender to the top with water.
Next, I added a few drops of food coloring as an experiment, see if I could add color to the white paper. We'll see how that pans out in the upcoming photos (hint: it didn't)
Blend until the pulp mixture is about the consistency of porridge (not quite as thick as oatmeal).
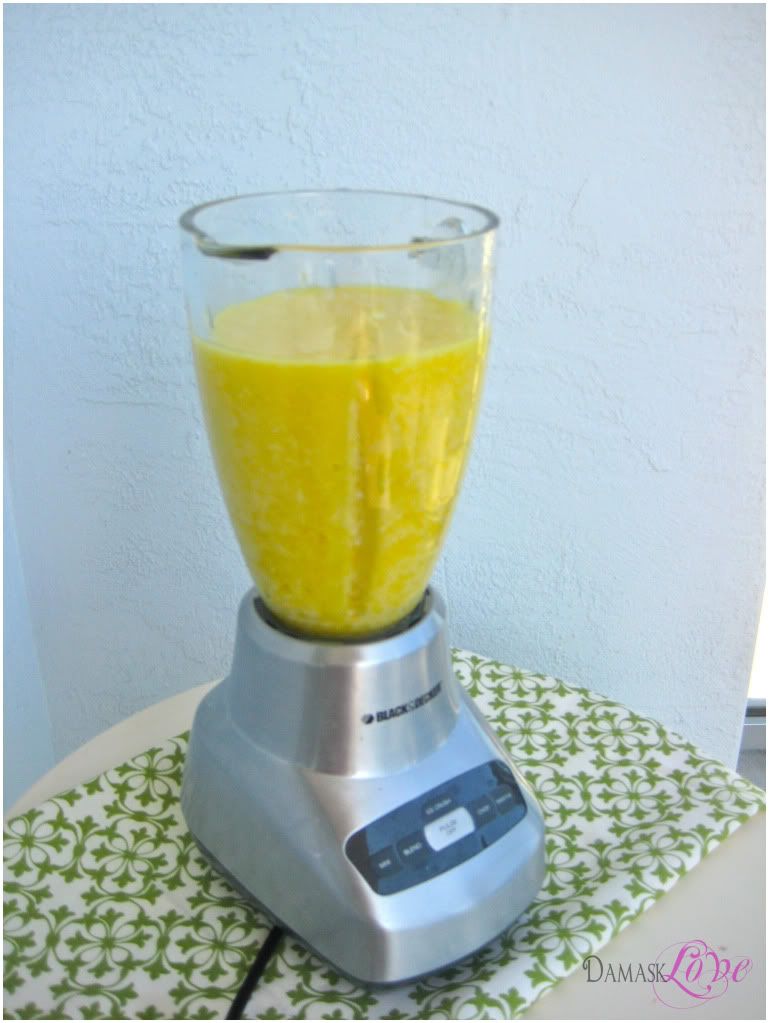
(see what I mean about the smoothie)
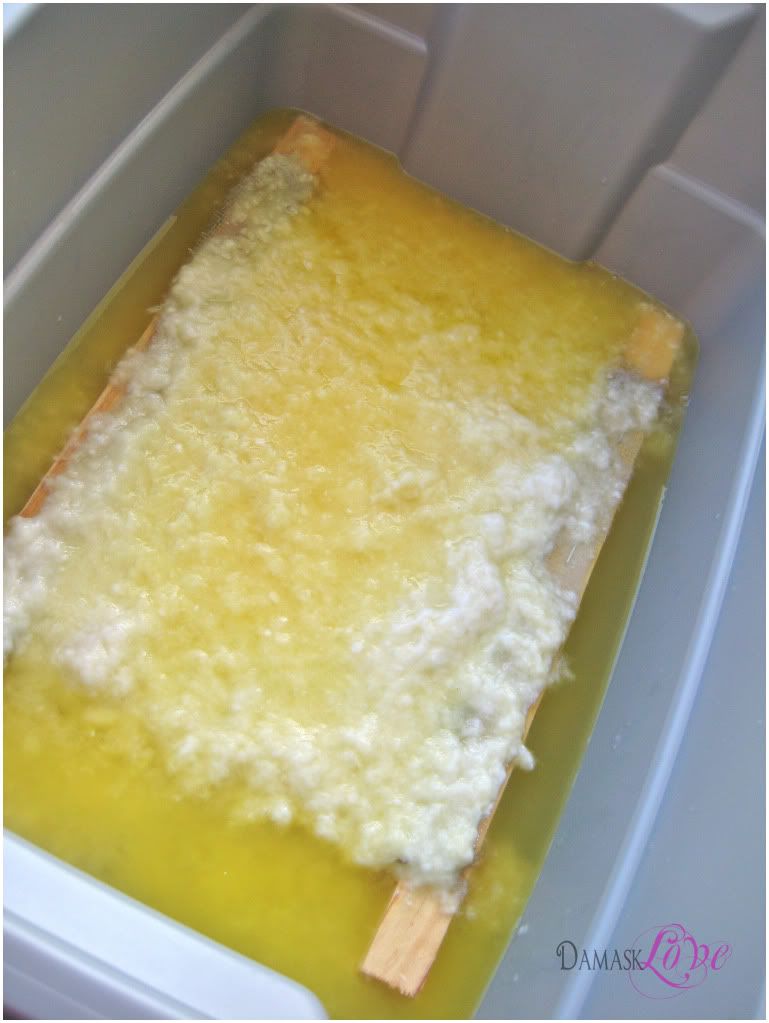
Step 4: Pour the Pulp
Place the mesh frame into a rubber tub...
...and pour the pitcherful of pulp over the frame. You may need to add additional water to the tub to make sure the mesh frame is completely covered with water/pulp mix.
Swish the frame around in the water to be sure the the paper pulp has landed on the mesh frame!
(this is the step where I realized that adding food coloring would do nothing to enhance the color of the paper, ah well!)
Step 5: Pull the Pulp out and Scatter Seeds
Lift the frame from the water and rest it on the rubber tub.
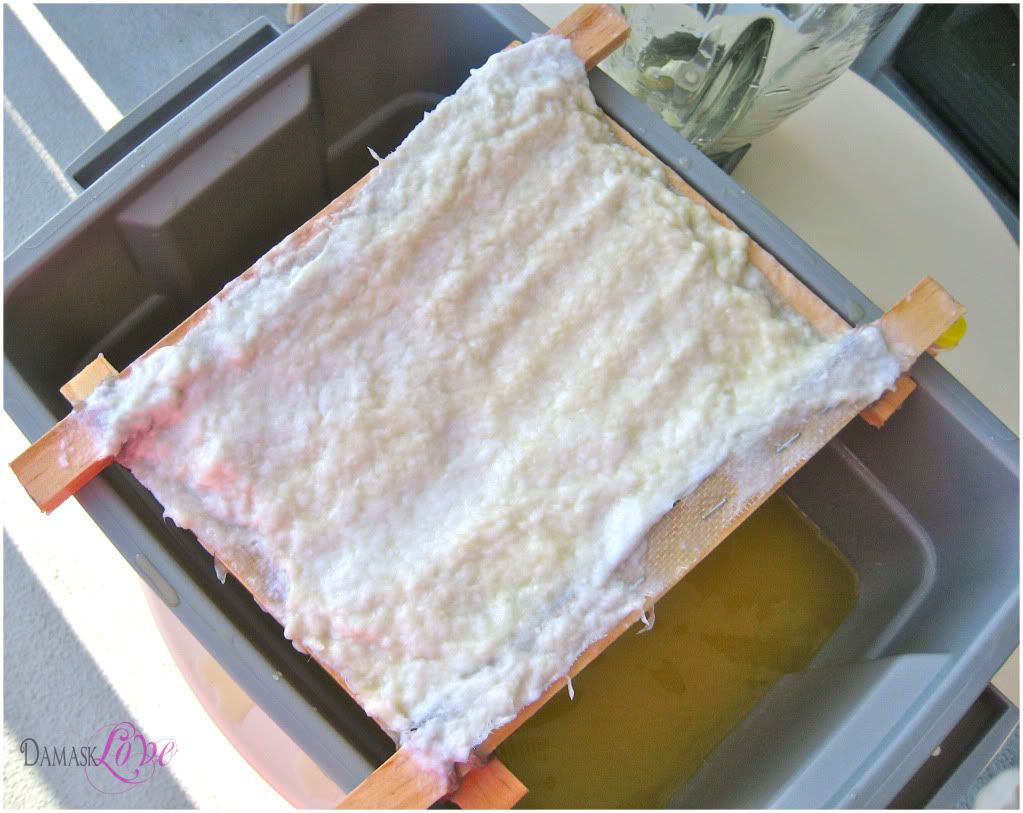
While the pulp is still waterlogged, sprinkle the seeds onto the pulp.

Use your hands to press out most of the water from the pulp. This will press the seeds into the pulp and help them stay put. You can even move the pulp around a little to make sure the seeds are nicely nestled.
Step 6: Let the Paper Dry
With most of the water gone, you can turn the pulp, which will now be more like paper, out onto a cookie sheet lined with an old dishtowel. Layer another towel on top and press down to push out the last bits of moisture.

At this point, the pulp will be delicate but stiff enough to handle.
Gently place the paper on a drying rack or cookie sheet and allow to dry for 24-48 hours.
DONE!
This process goes by very quickly! In the course of an hour, I made four sheets of plantable paper... two of which, I made with some scraps of PTI cardstock
*hint: given the thickness of PTI cardstock, allow the shredded cardstock to soak in the water before blending it. This will soften the paper and result in smoother pulp*
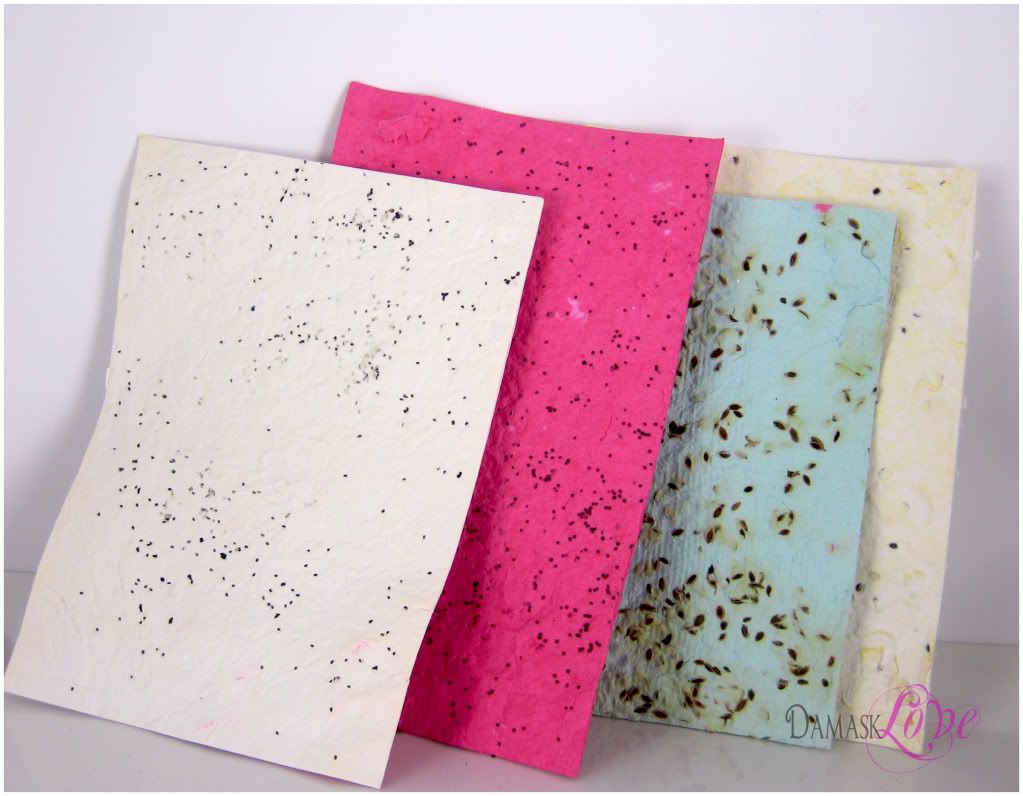
So what happens after you have made the paper?
Here's what the paper will will look like after it's dry (not so beautiful, huh?!)
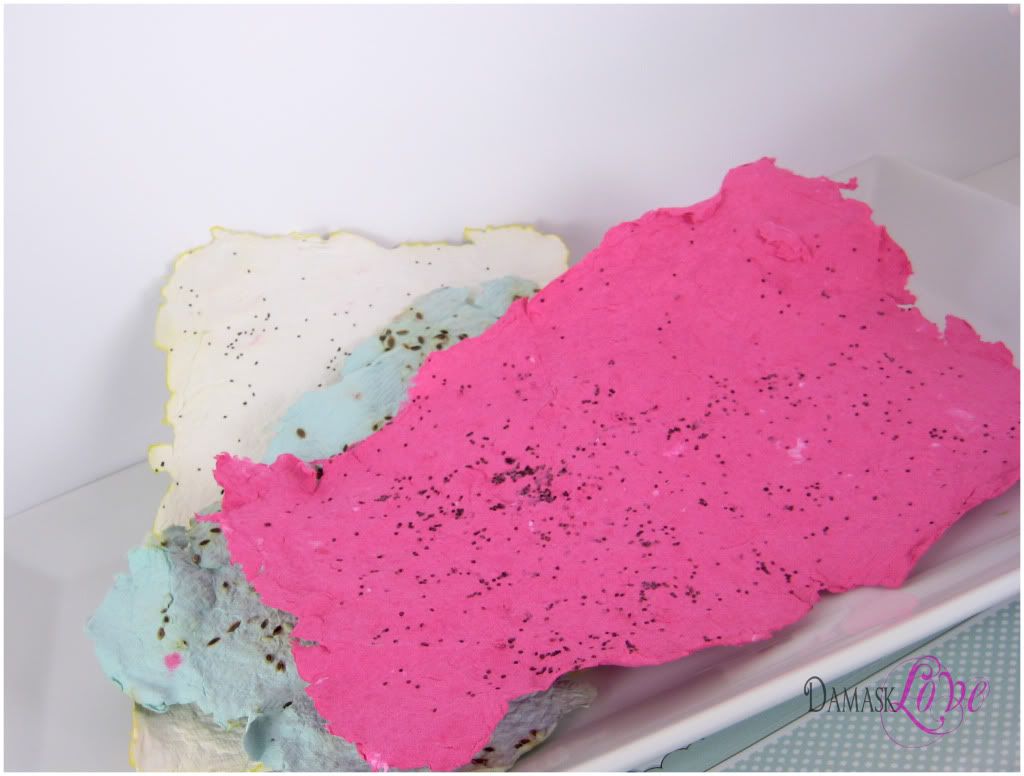
First, I trimmed the edges of the paper and ran it through my Cuttlebug. This will flatten the paper, which might be a bit warped. It will also press the seeds into the paper so they won't budge!
 |
| front |
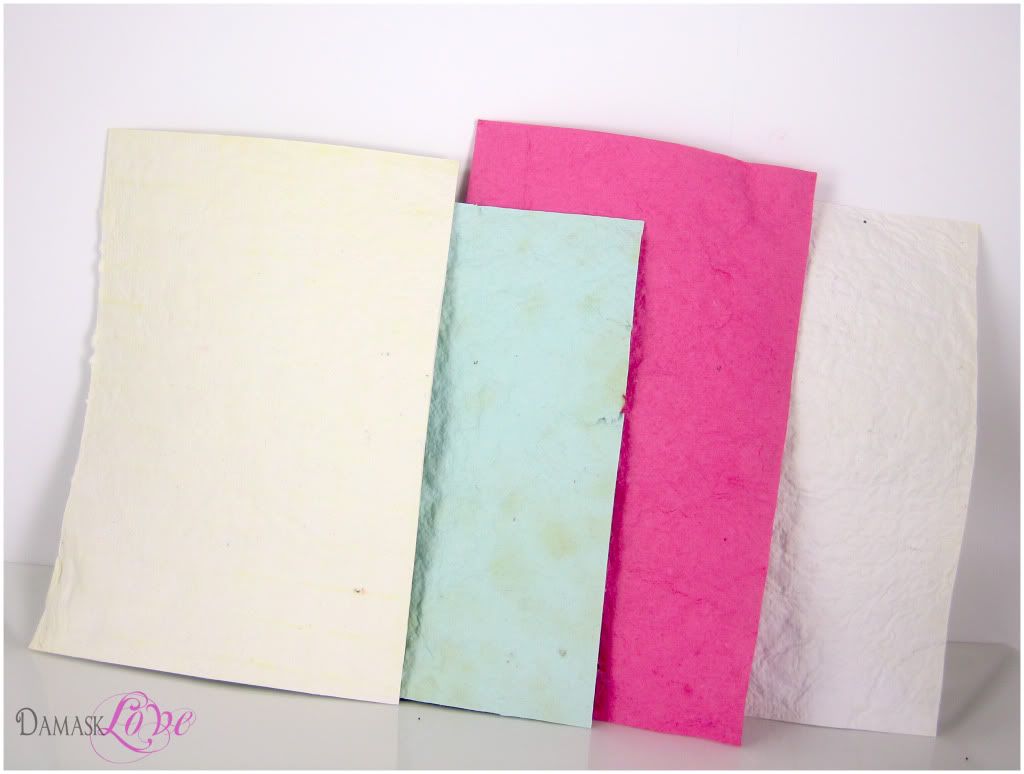 |
| back |
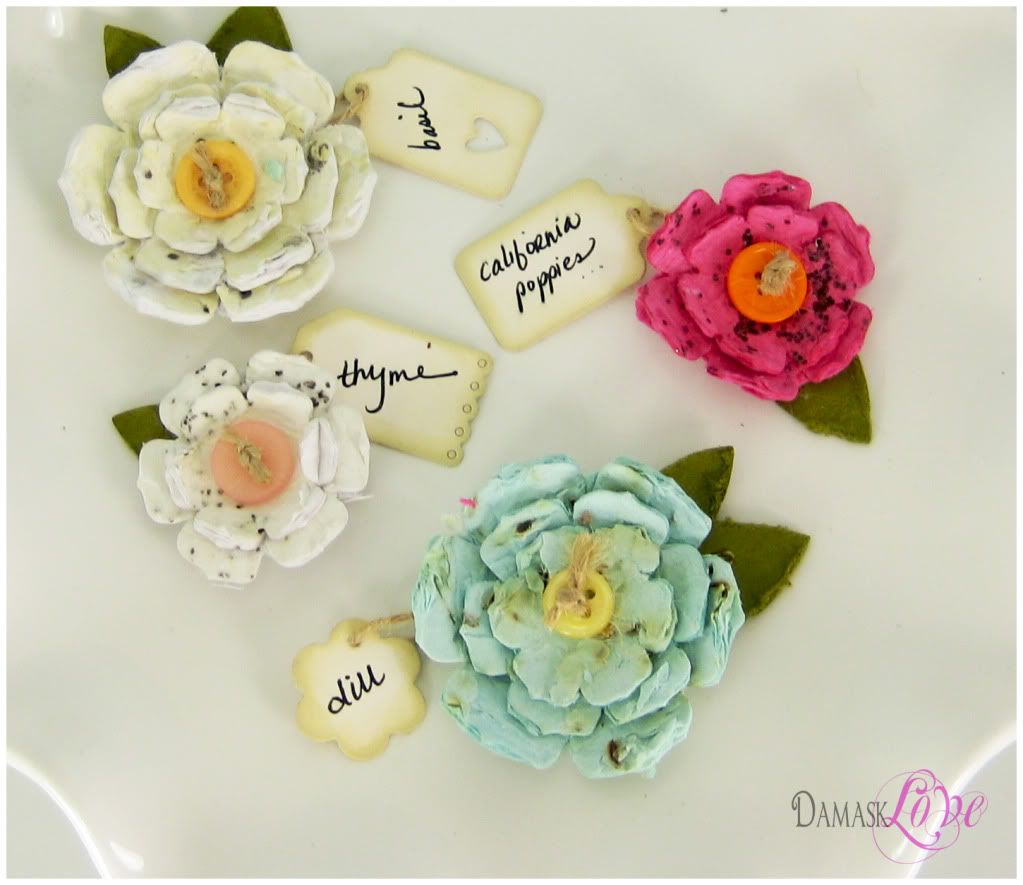
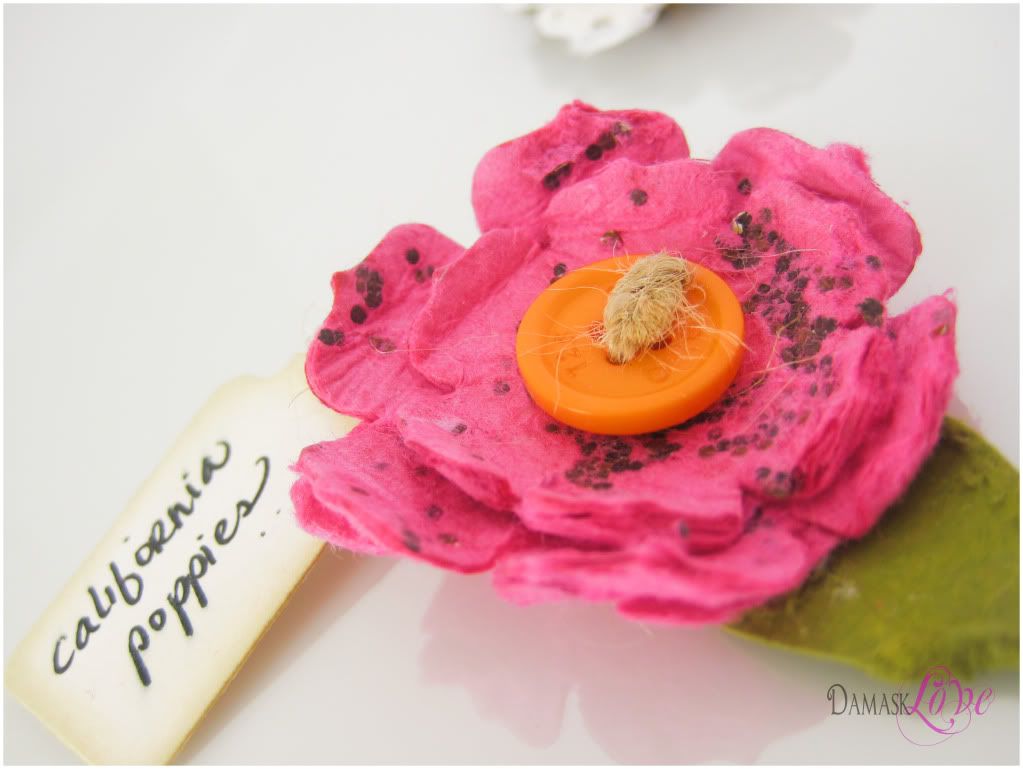
Next, I made a few flowers, just as I would with any other cardstock. Some Tiny Tags added a cute touch, as well as functionality, since they tell what the seeds are!
I like the look of the seeds on the flower, so I let them be visible. You can certainly hide the seeds by using the back of the paper as the front of your flower.
I like the look of the seeds on the flower, so I let them be visible. You can certainly hide the seeds by using the back of the paper as the front of your flower.
With all of that done - just add the flower embellishments to a card or tag!
You can even pair this up with a sweet miniature terracotta pot, a bag of potting soil to complete the gift.
And on the inside of the card - a little rhyming ditty to instruct the recipient!
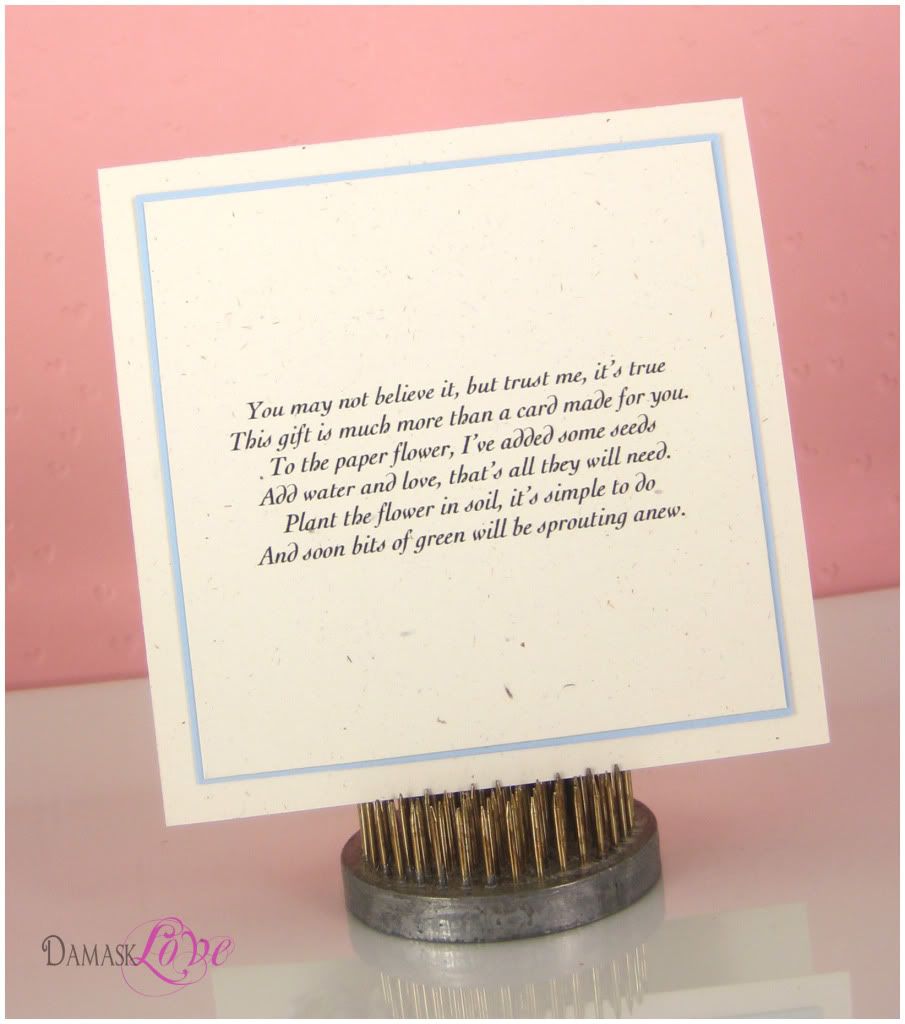
(hey...I never claimed to be Shakespeare!)
If you have made it all the way to the end of this post, without cursing my name or giving up on me...I am sending you all the Damask Love in the world and inducting you into the Damask Love Blog Reader Hall of Loveliness!
I've been wanting to include more involved projects on my blog for a while, and now, I can finally check that off my list!
Now - get back to hopping through those blogs! There is tons more inspiration waiting for you!
Adios Damask Lovers,
Amber
I've been wanting to include more involved projects on my blog for a while, and now, I can finally check that off my list!
Now - get back to hopping through those blogs! There is tons more inspiration waiting for you!
Adios Damask Lovers,
Amber
Woah, Amber! You outdid yourself! You MADE YOUR OWN PAPER? Holy Christmas! Beautiful results, though, and beautiful cards.
ReplyDeleteHi Amber I'm new here and I must say you are quite the artist!!! Love the detail and yes I made it all the way to the end of your post and never even thought of ... you are just awesome!!! Thanks for the inspiration in every way. I know what I'll be creating next ;)
ReplyDeleteWow, wow, holy cow wow!!! This project is truly incredible. Martha and Oprah should be nervous!!! This is just the most clever idea and I love your packaging with the soil and terra cotta pot. Simply adorable!!!
ReplyDeleteFabulous, Amber!! So creative! Love your work. The cards are beautiful and the flowers are gorgeous.
ReplyDeleteWow, Amber!! This is beyond cool - how in the world did you come up with this???? I am shocked at your creativity - literally jaw is dropped right now! I am so impressed. The cards are stunning & the idea is just fab.
ReplyDeleteWay to rock that challenge, Amber. The cards are lovely and even more fun because of the hand-made paper.
ReplyDeleteWOW! This is FABulous! Love that you made your own plantable paper, and those flowers are gorgeous!
ReplyDeleteWow! This is just fabulous! I love this! The flowers are gorgeous and I love that they can be planted to create real flowers. Wonderful submission of this challenge!
ReplyDeleteThis is amazing!! I am thinking of teacher gifts and hostess presents. Thank you so much for sharing. Simply amazing!
ReplyDeleteOh my word Amber - I love how your brain is wired!! Fabulous idea and execution. Great! Love it!
ReplyDeleteWow, Amber, this is FANTASTIC! What a great idea and great tutorial as well. Your cards are gorgeous!
ReplyDeleteWHOA -- winner -- LOL!!! This is simply fabulous and you are sooo clever/creative!!! :~)
ReplyDeleteThis is Fantastic! First, your cards are so Cute and Pretty! I love your idea to make them 'reusable'. Definitely placing this post in my file to try on a quieter day. Thanks so much for sharing your 'out of the box' idea!
ReplyDeleteOMG. Girl, you are WAAYYY out there in the creative forefront. Seriously. You should have classes. These cards are gorgeous...really beautiful and I love love love your paper. Too cool!
ReplyDeleteYou make me smile {in that, could you be more clever way!} Brilliant gift idea and the distressed chevron is fantastic too!!
ReplyDeleteRobin
This is amazing. Love the final product. Just beautiful.
ReplyDeleteThis is my first time visiting your site.
http://sweetvintagelady.com
Wow, what a fabulous idea
ReplyDeleteJo x
Excuse me while I pick my jaw up off the floor!! Amazing! I would have NEVER thought of that! TFS!!!!
ReplyDeleteGET OUT!!!! THIS IS AMAZING, AMBER!!! I love that you made plantable paper!!!! BRILLIANT!!! I'm tagging this for sure!!! WOW! Love this idea!!!! Thanks for the inspiration!!!
ReplyDeleteThis is AMAZING! You are so brilliant. Thanks for sharing.
ReplyDeleteGreat project Amber...totally doing this one!
ReplyDeleteHoly cow, girlfriend! That was really cool! I will be coming back and re-reading this when I am finished hopping. TFS! I really love the vintagey/distressed chevrons on your cards- wonderful :)
ReplyDeleteHOLY PLANTABLE PAPER!!!!! I'm stunned!! you should win an award for this!!! you're a rock star!
ReplyDeletewow! Your flowers are amazing!! I agree with Laura, an award is in order! Love how perfect they go with the chevron print, too!
ReplyDeleteabove and beyond! you are just too much!!! fantastic idea and amazing results.
ReplyDeleteYou are *so* clever... seriously, they look awesome, and what a neat idea!!! I have a friend who would just LOVE this, and she's totally worth the work. Thanks for the great tutorial!!! (I put in my post today that I felt I was channeling my inner Damask Love because I did something CAS, but now you go an do this to prove I was *so* wrong..!!) hahaha....
ReplyDeleteUmmmmm....amber? Holy cow girl! This is amazing! What a fun idea!
ReplyDeleteO.M.G.
ReplyDeleteWhere on earth did you get this idea?!?! Simply out of this world! Super creative! :)
Oh. Your cards are great btw! :P
Wow! Truly unique! Thank you for the fabulous idea and the wonderful design!
ReplyDeleteWow! What a fantastic, original and very very clever idea! I love the card design and then you went and made seed flowers! Sheeh, you're a genious!
ReplyDeleteNO WAY.....this is sooooo cool!!! I love it! ;)
ReplyDeleteWow, this takes the cake for sure, are you sure you're trying out for Martha's job?
ReplyDeleteLOVE!
ReplyDeleteAbsolutely fantastic!!! I am definitely intrigued and want to try this myself! You come up with the most original ideas!
ReplyDeleteWOW! This is amazing! Love the "green" set of cards!!
ReplyDeleteOh, wauw, this is amazing!! I had a close look at the first photos of your card to see what kind of paper that was, but then I saw your tutorial and it's just perfect!!! It has a gorgeous look this way! Love it with the chevron pattern, perfect flowers, perfect cards!!
ReplyDeleteHugs, Wendy
Great post, Amber. Not only is the project great, but the description might be even better.
ReplyDeleteLike Wendy I was trying to figure out what paper you used at the beginning of your post, that is me being impatient. LOL Then I saw you made it, what an incredible idea! Very Martha Stewart of you, without the impossible. Love it and love your creativity.
ReplyDeleteFabulous! Believe it or not, I have made the paper, but never used it to die cut - just as note paper. And your poem is wonderful. Thank you so much for sharing this with us. I'm saving it for some very special friends. (you might find it on Pinterest) I love taking the time to read a well done blog entry. That's why I seldom finish a huge hop.
ReplyDeleteHow. Very. Cool. Thank you for sharing this fabulous creative idea with us, Amber, and for documenting all the steps! It's like you gave all the hoppers a gift! :-) What beautiful cards you made to showcase your idea! Sigh. Love it all!
ReplyDeleteUnbelievable! I loved the Chevron Stripes, I had no idea how wonderful this whole project was! Fantabulous...!
ReplyDeletethis is so cool! what a fabulous idea and the finished product is gorgeous!
ReplyDeleteWhat a great idea! Love the finished flowers and they look great on the cards too!
ReplyDeleteThis comment has been removed by the author.
ReplyDeleteThis is all kinds of awesome Amber!! Each paper, each flower, each card a stunner!!
ReplyDeleteOh my gosh, I'm squealing so loudly in my head!!! Love, love,love, love LOOOOOOOVE this! Totally doing this with my kids this summer. {swoon}
ReplyDeleteJust incredible!!! And I think that's better than Shakespeare... ;)
ReplyDeleteI can't promise I would go through all this but the potential recipients keep dancing through my head! Fab idea!!
Amber, you're a genius!! I love the card design and stitching. Your homemade plantable paper on top makes is just WOW!
ReplyDeleteNot only are your flower cards practical, but they are beautiful as well! This is an amazing idea!! Good luck with the challenge!
ReplyDeleteThis is amazing!!! The cards are so lovely, and your flowers make a fabulous gift!
ReplyDeleteThis is such a fabulous idea. The cards are gorgeous, but the flowers are ingeniuos.
ReplyDeleteWow, what a fabulous idea!! I've seen these plantable papers before, but had no idea one could make them at home. Lovely cards.
ReplyDeleteI LOVE THIS!!! What a lovely thought! TFS!
ReplyDeleteAbsolutely fabulous!!!
ReplyDeleteThat is so cool! They look fab and are a great idea. I will definitely have to give these a go!
ReplyDeleteSERIOUSLY GET OUT! You should win a special blog hop prize tonight just for the creativity of this post! I'll admit, at first I was looking at the pictures and cracked up at the blender shot, because I thought that you made a card that you didn't like, heee! Once I got to the little finished paper pics, I shot back up to the top. That paper is AMAZING! I just love everything about each card, and then to find that you can grow flowers from them, ACCCK! But I so wouldn't want to put those pretties in the ground ;)!
ReplyDeleteNo WAY! That is genius! I love the little poem :) What an awesome gift. Thanks for the instructions too!
ReplyDeleteAWESOME in every way!!! TFS!!
ReplyDeleteThis is by far the most creative thing I have ever seen on a card! I so want to try this. thanks for the tutorial.
ReplyDeleteawesome flowers and awesome cards!!!
ReplyDeleteYEA!! So glad you have pop up comments now so I can comment again! LOVE these cards so much!! Your creativity never ceases to amaze me and I have no idea how you fit everything in! Such a creative idea to make the flowers plantable! LOVE these all so much!!
ReplyDeleteThis is fabulous! I have to try this with my grandchildren! Thanks!
ReplyDeleteI once made my own paper with bits of pot pourri in it to write my A Level Art context essay on. Unfortunately I never had a cuttlebug back then - that would've solved many of my problems! I think you also made a much nicer, smoother pulp than I managed to! Putting seeds in it is a fantastic idea! Have you tried planting any yet?! I think I may have to give this a go! I know my mum would love it as she spent soooo much time with me helping to make my paper all those years ago!
ReplyDeleteThank you for re-inspiring me!
This is just the COOLEST gift idea and what a lovely way to say thank you to someone too. Your tutorial makes it look so easy to do - I can't wait to have a go! TFS
ReplyDelete